In a recent development, MicroK8s replaced its dockerd installation with containerd. Many pre-existing sources mention “microk8s.docker”, but this command is no longer available. I will walk you through the full initial installation and basic usage on Ubuntu 18.04.
Practically speaking, this means you now need to install Docker on your Ubuntu machine. In previous versions, MicroK8s came with its own Docker client, which was handy for quick prototyping with local Docker images. Continuing to use local Docker images with the new version of MicroK8s requires a Docker installation and an update to your workflow.
I am using Ubuntu 18.04, which comes pre-installed with snap, a software deployment and package management system. If you are using an earlier version of Ubuntu which does not have snap installed you can install it using the following commands:
sudo apt update
sudo apt install snapd
Installing MicroK8s, 1.14
Execute the following commands from the Ubuntu terminal:
sudo apt-get install docker.io
sudo snap install microk8s --classic
microk8s.enable dns dashboard registry
Enabling “registry” is important if you want to use local Docker images. The MicroK8s containerd daemon is configured to trust a local insecure registry, which is located at localhost:32000. The local registry does not need to be enabled if you intend to use Docker images from a remote registry. The registry can be disabled by executing the following command:
microk8s.disable registry
Enabling “dashboard” deploys the Kubernetes dashboard, which provides a visual overview of the cluster’s components. The dashboard can also be used to modify or delete individual components.
Enabling the DNS addon is always recommended. Doing so deploys the Kube DNS Pod and Service on the cluster. The Kube DNS is responsible for telling individual containers to use the DNS Service’s IP to resolve DNS names. This allows you to refer to ephemeral Pods by name and not by IP.
Executing kubectl within MicroK8s
Once the installation is complete, MicroK8s will start itself. To stop MicroK8s, run
microk8s.stop
If you restart your machine, you may need to run
microk8s.start
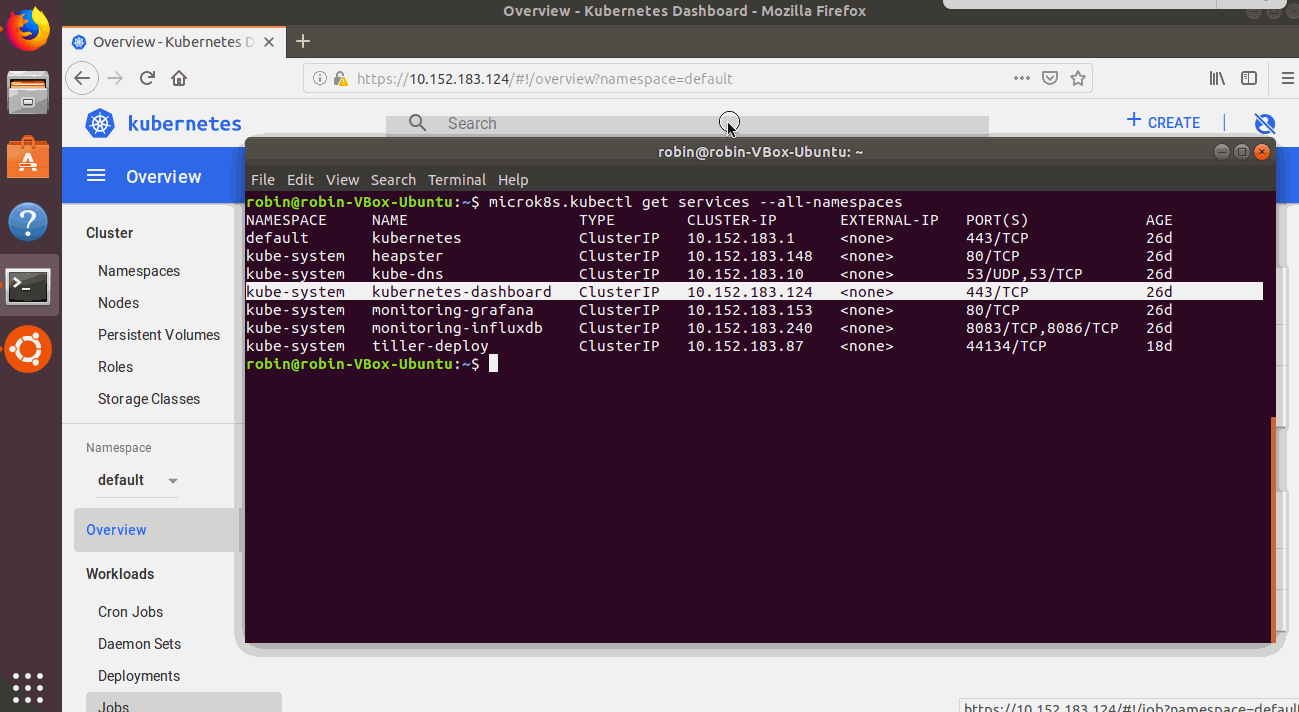
While MicroK8s is running, the kubectl commands will be available. In order to execute kubectl commands the ‘microk8s’ prefix needs to be present. For example, to find the ClusterIP of the K8s dashboard that you just enabled you would enter
microk8s.kubectl get all --namespace kube-system
MicroK8s Dashboard
To access the dashboard use the following url:
https://YOURCLUSTERIP:443
Note: Make sure to use https and not http. See image below:

The dashboard will work with any browser, but I used Ubuntu’s default browser, Firefox. If you are using Firefox you will encounter an authentication warning. Since I was using this for local development, it was fine to skip the k8s authentication. If this was a production environment a valid certificate should be used. (More info: https://github.com/kubernetes/dashboard/wiki/Access-control)
Local Docker Registry
To use the local Docker registry, make sure you tag images “localhost:32000/myimagename” and push them to the localhost:32000 registry. The Kubernetes YAML file definitions will refer to the images with the name “localhost:32000/myimagename”.
For example, executing the following commands:
docker build -t localhost:32000/myimagename /path/to/dockerfile
docker push localhost:32000/myimagename
will create an image “localhost:32000/myimagename” in the localhost:32000 registry. The image will contain a tag of “latest”. You can also define your own tag using the syntax “localhost:32000/myimagename:mytag”.
Using the localhost:32000 registry does make it more cumbersome to track which Docker images have been created and pushed to that repository. Running `docker images` does not show which images have been pushed to localhost. It only shows which images you have built. This snippet (thank you Stack Overflow) will print out a JSON representation of image names and tags from the localhost repository:
REPO_URL=localhost:32000

curl -k -s -X GET http://$REPO_URL/v2/_catalog \
 | jq '.repositories[]'
 | sort \
 | xargs -I _ curl -s -k -X GET http://$REPO_URL/v2/_/tags/list
Congratulations, you are now up and running with a MicroK8s installation!
Thoughts About MicroK8s
The reason I initially began using MicroK8s for local development was the ease of installation and configuration. Since I was new to Kubernetes, I researched and compared two popular options, Minikube and MicroK8s. Ultimately, I chose to use MicroK8s for local development because the installation was straightforward. This made the tool itself straightforward and easy to use. With the update to 1.14, I’m no longer certain that MicroK8s has the advantage over Minikube. To me, one of the biggest MicroK8s selling points was that it included its own Docker installation. Compared to Minikube, there were fewer pieces necessary to install and configure.
In Conclusion
I ended up using Minikube to sanity test my work after I updated to version 1.14 of MicroK8s. It was not at all easy to completely remove MicroK8s Docker images – somehow the cluster was still accessing them after the update. Despite my best efforts I couldn’t find and delete them in the filesystem, and I no longer had the “microk8s.docker” command to manipulate them. To save time and effort, I ended up restoring a previous snapshot of my Ubuntu VM, which completely removed the MicroK8s Docker images. Only then was I truly able to move forward. Re-installing MicroK8s from the beginning was still reasonably straightforward, but removing Docker from MicroK8s definitely increases the learning curve for a first-time user.


